
For organisation admins: Organisation Manager
Find your way around
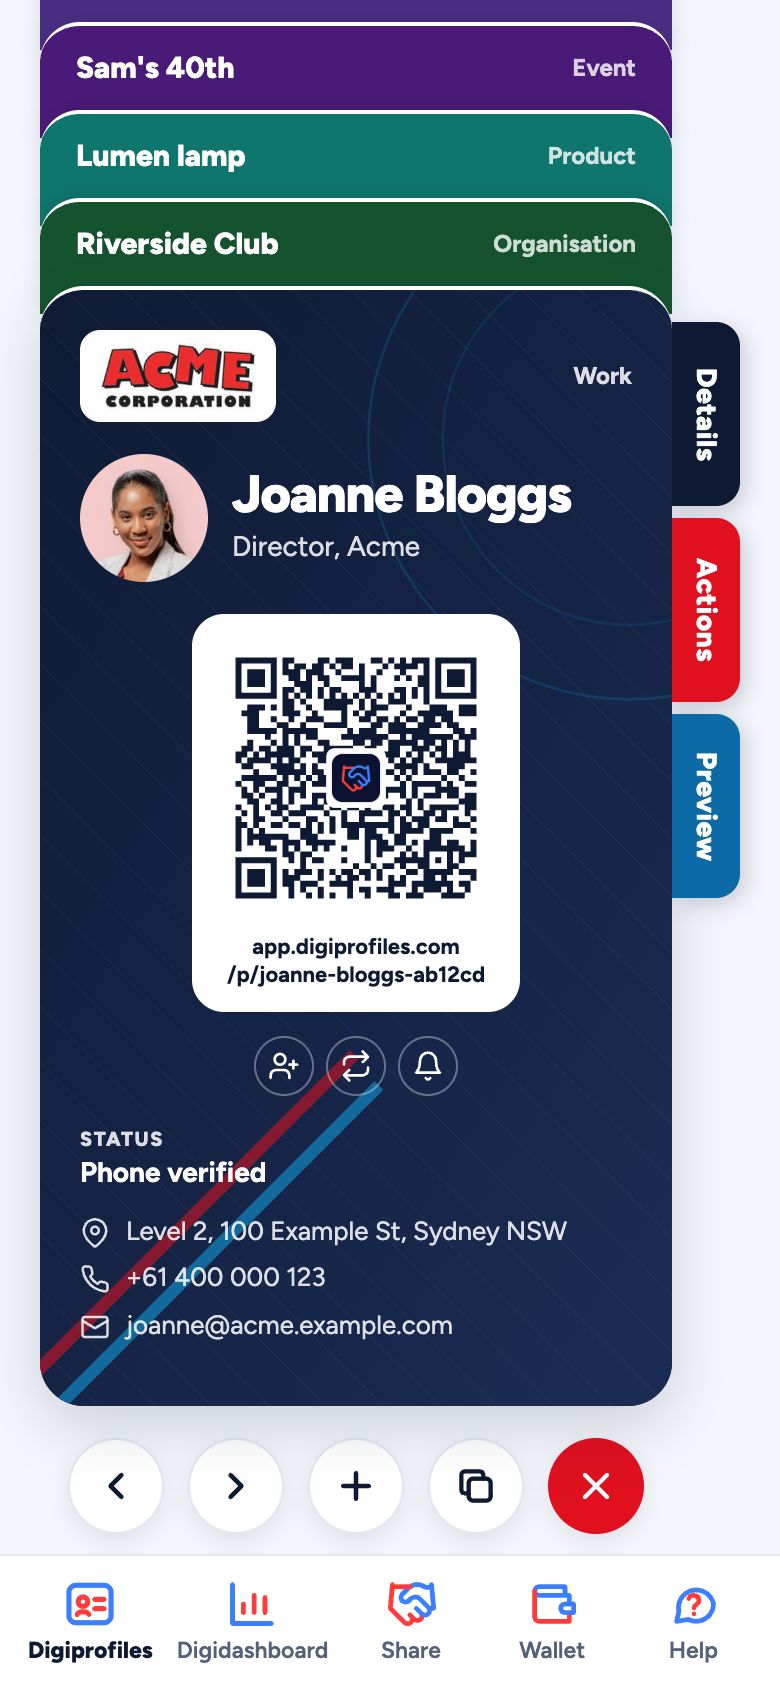
The app opens on My Digiprofiles, with your Digiprofiles stacked like the cards in a wallet. The one you're working on is in full at the bottom, with its QR code ready to scan, and the others' tops sit above it.
- Tap the top of a profile to bring that Digiprofile to the front, or use the < and > buttons under it. After the last one comes the first again.
- The three tabs on the right of the Digiprofile do everything for it: Details turns it over to edit it, Actions turns it over to choose its buttons, and Preview turns it over to show the page people see. On the back, the top tab says Profile: tap it to turn the Digiprofile back.
- The buttons under it: < and > (previous and next), + (a new Digiprofile), Duplicate (a copy to start from) and the red X (delete). Duplicate and Delete ask first.
- The bottom menu is the same on every screen: Digiprofiles (back here), Digidashboard, Share (the handshake icon: every way to share, including Handshake), Wallet and Help.
- The menu button (three lines, top left) has everything else, such as My Contacts and My Tasks. A red number on it shows open tasks.
Tip The coloured date at the top shows when your subscription is paid until: green when paid, orange during a free trial, red in the last 30 days or once it has ended. Tap it to see your subscription.
Tip Your account, subscription and sign out are under the circle with your picture or initials, top right.
Tip To open Digiprofiles from its own icon like an app, open the menu and tap Add to home screen.
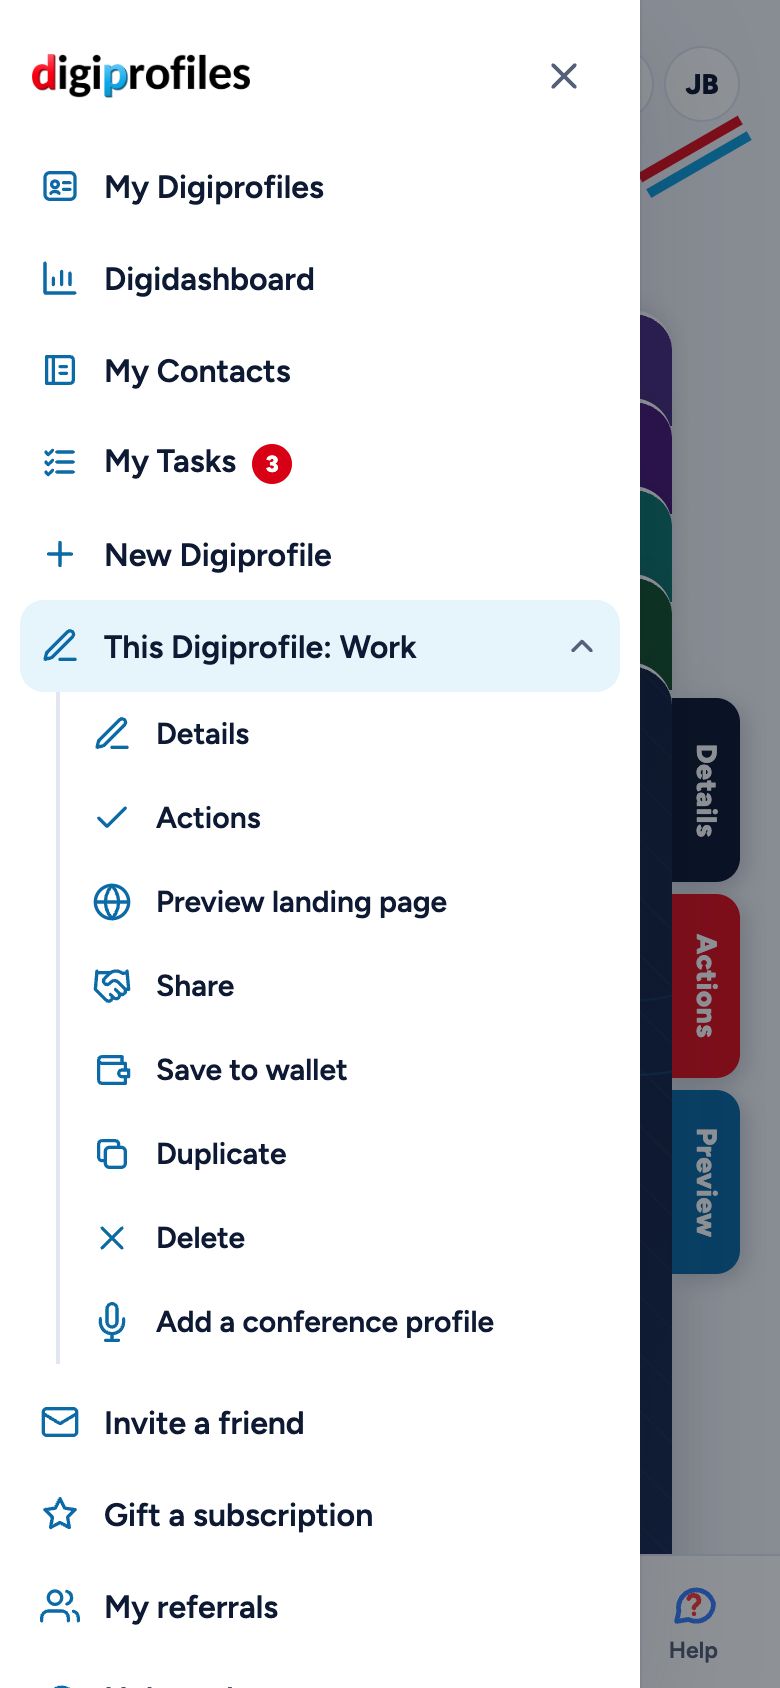
The menu
Tap the three lines at the top left of any screen. Every function in the app is here.
- My Digiprofiles, Digidashboard, My Contacts, My Tasks (with a red number when tasks are open) and New Digiprofile.
- Invite a friend, Gift a subscription and My referrals (who joined through you, and the invitations you've sent).
- This Digiprofile: tap it to open the options for the Digiprofile in front (or the one open): Details, Actions, Preview landing page, Share, Save to wallet, Duplicate, Delete and Add a conference profile. Options that don't apply are greyed out.
- Help and more: Help, Help guides, Write a review, Report a problem or make a suggestion, Safeguards, Report a dodgy Digiprofile, Add to home screen and About us (who runs Digiprofiles, and our social media).
Tip Your account, subscription and sign out aren't in this menu: they're under the circle with your picture or initials, top right.
Make your first Digiprofile
A Digiprofile is a digital profile for one part of your life. You can have one for work, an event, a product or service, or a club.
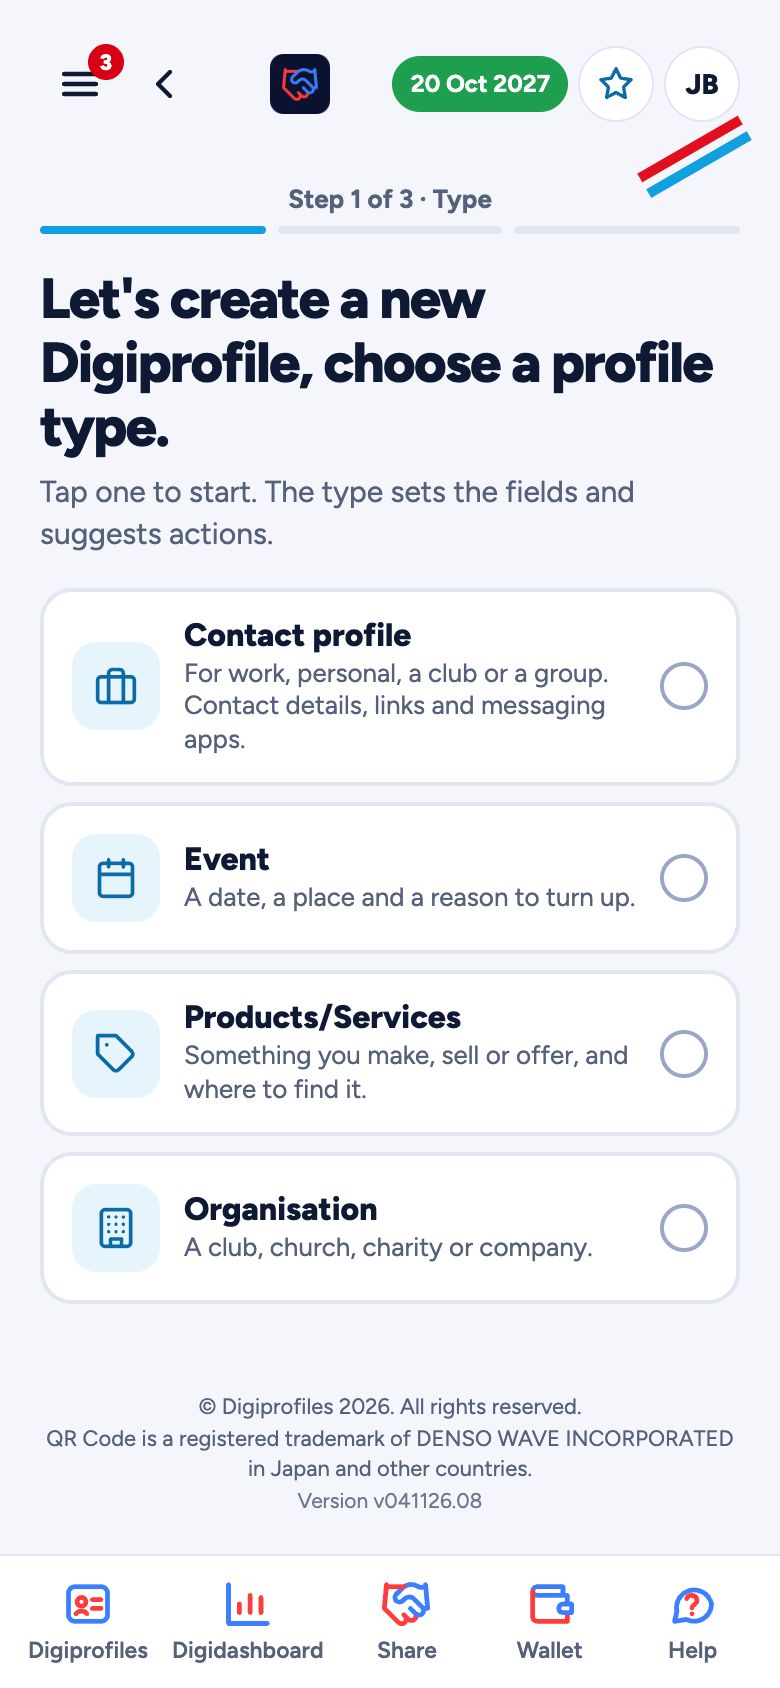
- Tap + under your Digiprofiles (or New Digiprofile in the menu).
- Tap what you're sharing: Contact profile, Event, Products/Services or Organisation. It goes straight to the details.
- Fill in the details people should see: your name, role, phone numbers, emails, websites and social accounts. Add a photo or logo and pick your colours or a theme if you like. New Digiprofiles start light grey.
- Choose the actions people can tap, such as Save contact, Call, Email or Share your details. Tap Continue.
- Save it. Your Digiprofile is ready to share straight away.
Tip Phone numbers can have a title such as Mobile, Landline or Fax, and an extension (e.g. +61 3 9000 1234 ext 22). A Contact profile can also list your Qualifications.
Tip To add a contact detail or link, tap Add contact (email, phone, website and messaging apps such as WhatsApp) or Add social (Facebook, Instagram, LinkedIn, TikTok and more) to open it, then pick a tile.
Tip Fields marked * are needed. If one is missing, the app takes you to it and shows it in red. Examples in empty fields start with "e.g.".
Tip Tap Add an image for a photo or logo. Your phone offers the camera or your photo library.
Tip Under Digiprofile background and colours, choose Colour, a Theme (Digiprofiles, Stars, Planets and moon, Sky, Flowers, Corporate, Light corporate, Fun, Party, Sport, Cars or Sewing; tap the arrows to see them all) or My picture to use your own photo. Themes and pictures show in the app and on your landing page; Wallet passes always use the colour.
Tip For photos and logos, images with a transparent background (PNG) look best. On a Wallet pass the logo sits in a small space on the background colour: a squarish logo shows biggest, and a long, wide one is shown whole but smaller.
Tip Each Digiprofile has a "Digiprofile name" (for example "Work"). It's the title on your Wallet pass and how you tell your Digiprofiles apart, so each one must be different. It never shows on the landing page or in anyone's contacts.
Tip Choose the number Call and Send a message use, and point the Website button anywhere, such as your booking page, with your own wording.
Tip To make a similar Digiprofile, bring it to the front and tap Duplicate (the two squares under it).
Tip Going to a conference? Bring your Contact profile to the front, open the menu (three lines, top left), tap This Digiprofile, then Add a conference profile. You can have as many as you need. It gets its own QR code, link and actions, and works only between its start and end dates. It's listed under its Contact profile and counts like any other Digiprofile, with no extra charge.
Change a Digiprofile: Details
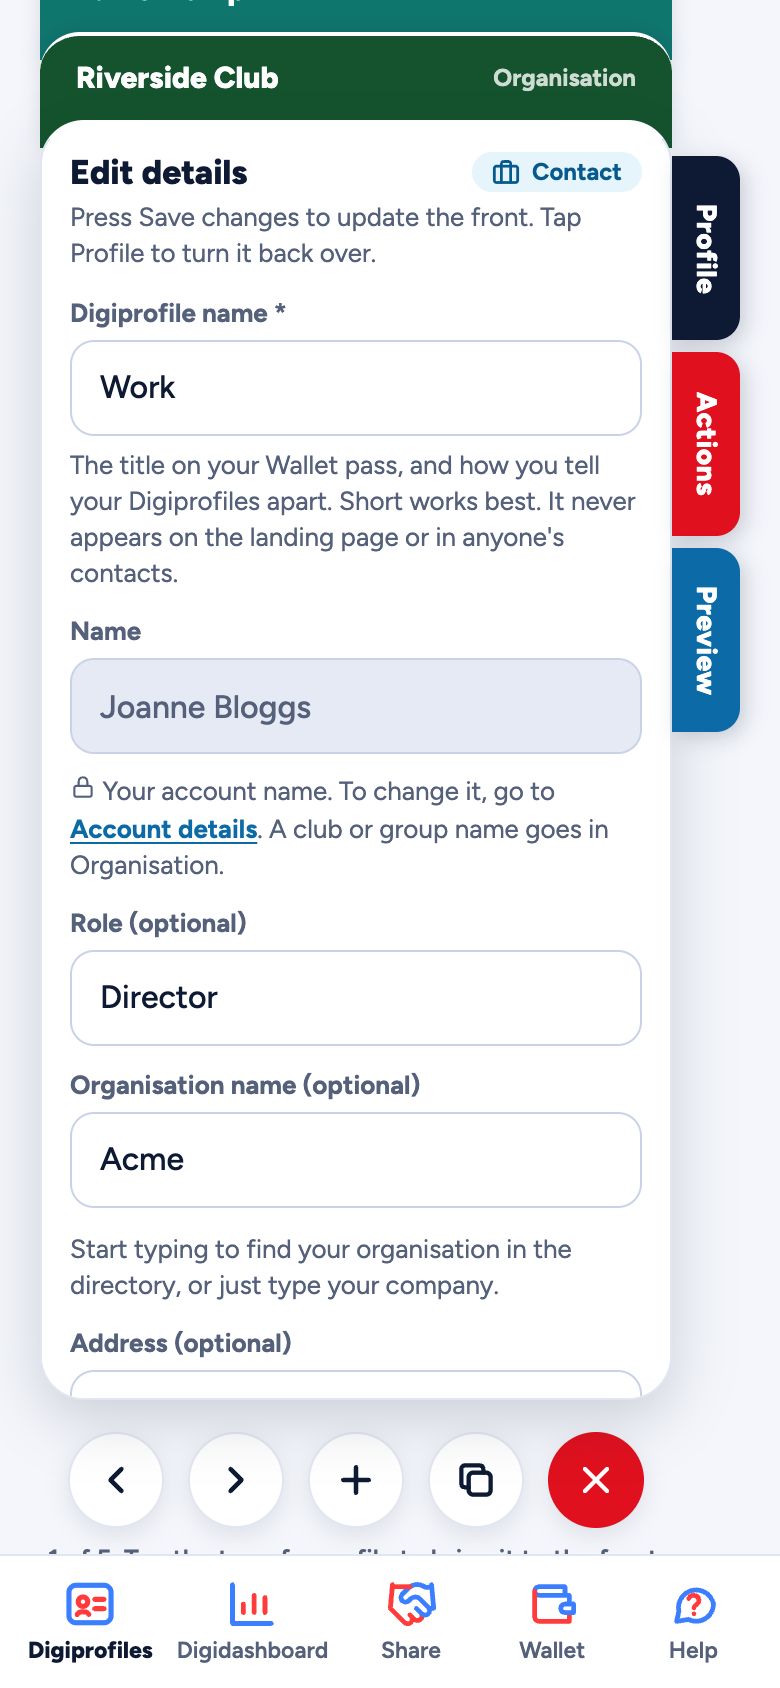
Everything about a Digiprofile is changed on the back of it, right there on My Digiprofiles.
- Bring the Digiprofile to the front and tap Details on its right. It turns over.
- Change the Digiprofile name, your role, organisation, contact details, photo, logo, colours or theme, and the middle of its QR code. Scroll inside the Digiprofile to see it all.
- Tap Save changes. It saves and turns back over, so you see the front straight away.
- To leave without changing anything, tap Profile at the top of the tabs.
Tip If you try to leave with changes not saved, the app asks: Save now, Keep editing or Leave without saving.
Tip Your name is your account name, so it's the same on all your Contact profiles. To change it, go to Account details (the circle top right).
Tip Known as is for a nickname or the first name people use, such as Jo for Joanne. It's empty unless you fill it in and never changes your account name. It shows under your name on the landing page, and is saved as the nickname when someone taps Save contact.
Tip An event's length is in its details: choose Hours (to one decimal place, 1.5 is 1 hour 30 minutes; empty means 2 hours) or Days (whole days from the start date, added to calendars as an all-day event).
Tip A Contact profile can list its Conferences. Each one is a Digiprofile of its own in the stack, shown with ↳ under its Contact profile.
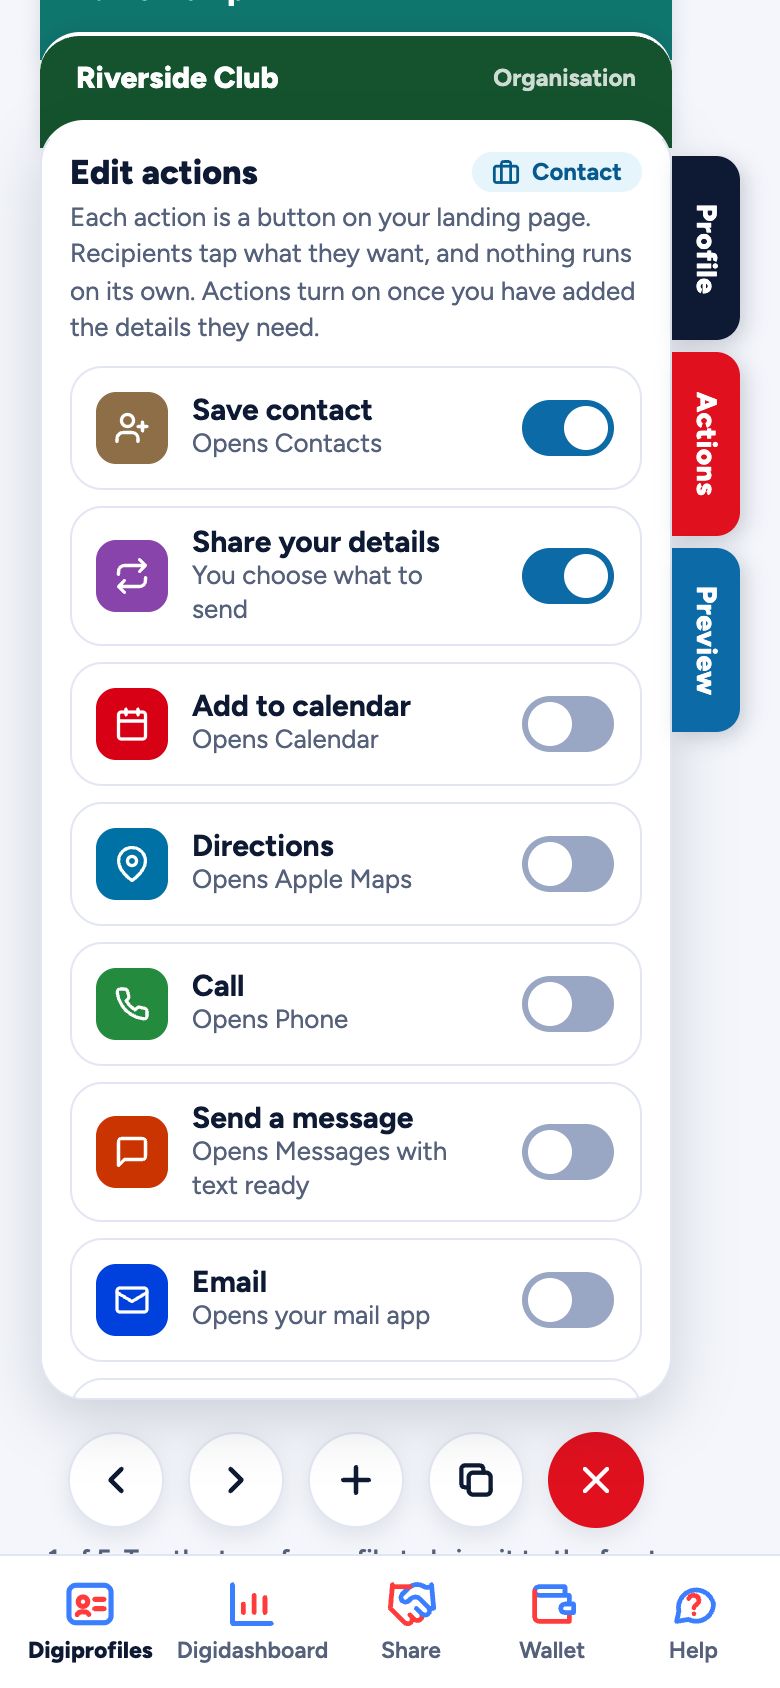
Choose its buttons: Actions
Actions are the buttons people tap on your landing page: save your contact, call, email, directions, add to calendar, a reminder to follow up, share their details with you, and more.
- Bring the Digiprofile to the front and tap Actions on its right. It turns over.
- Switch each action on or off. An action turns on once the Digiprofile has the details it needs, such as a phone number for Call.
- Below the list, choose the number Call and Send a message use, where the Website button goes and its wording, and how long an event in Add to calendar runs.
- Tap Save changes. It saves and turns back over.
Tip On a Contact profile, Add to calendar has its own event name, date, start time, place and length (empty means 1 hour), for example a webinar or launch.
Tip Social accounts in your details show on your landing page as invitations, such as "Connect with me on LinkedIn" or "Follow us on Instagram".
Tip The small icons on the front of the Digiprofile show the actions you've switched on.
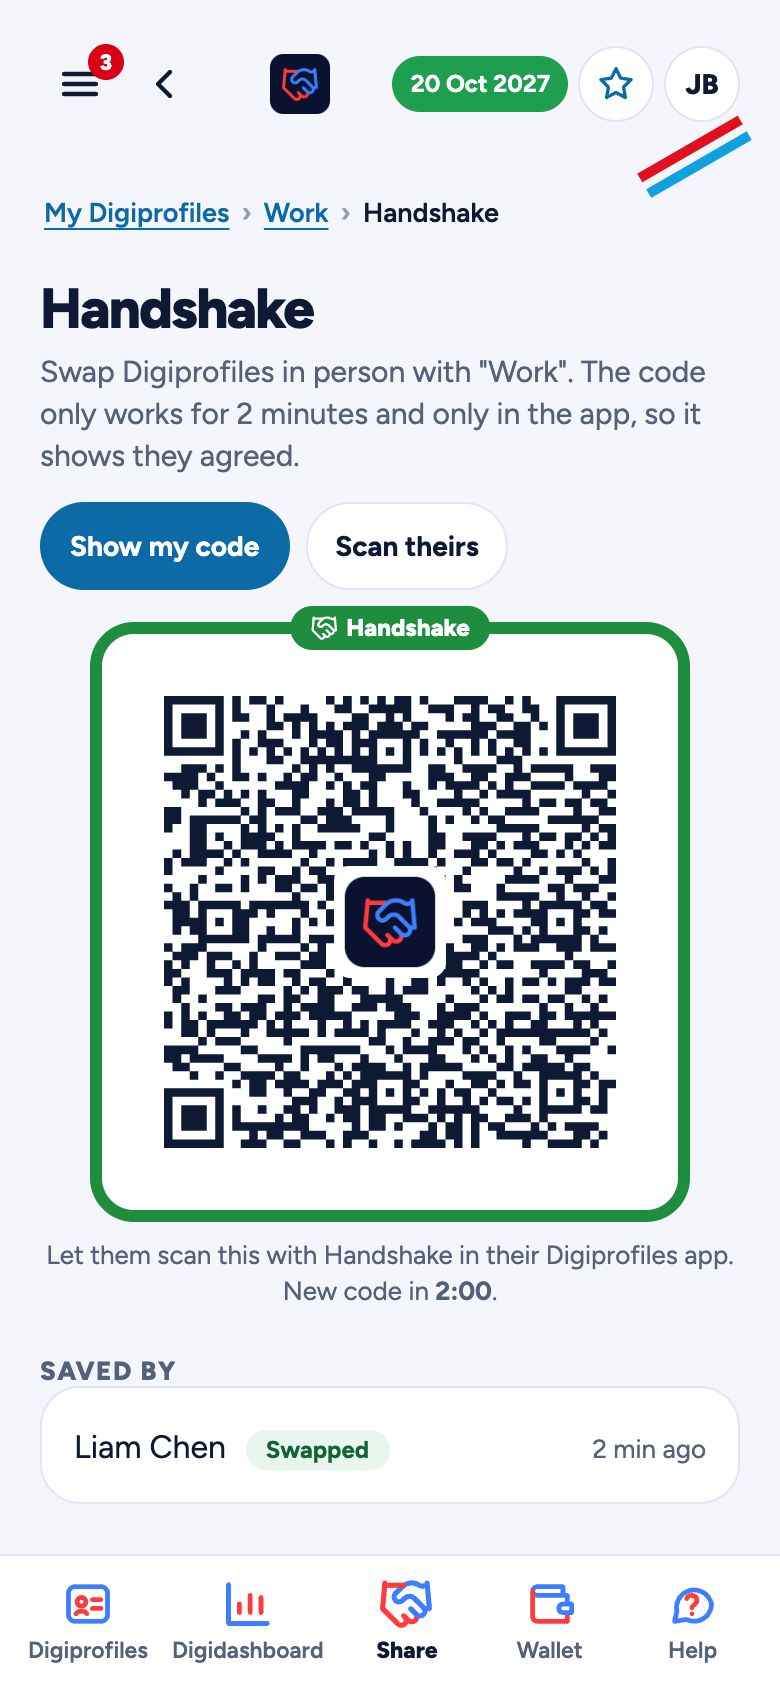
Swap Digiprofiles with Handshake
Handshake swaps Digiprofiles in person with another Digiprofiles member, so you both end up in each other's Contacts. No typing, and it shows you both agreed. It's the two-way part of Share.
- Bring your Contact profile (or conference) to the front and tap Share in the bottom menu.
- Want to meet again? Add an appointment first (see the appointments guide).
- Under Two way, tap Show my code to share yours. The green-framed code works for 2 minutes, then renews itself.
- To save theirs, tap Scan theirs and point the camera at their code. Allow the camera the first time.
- Check their details and tap Save to my Contacts. You both go into each other's Contacts, and both phones give a short buzz.
- Added an appointment? Tap Show the appointment code so they can accept it.
Tip Handshake is for Contact profiles and conferences. On Products/Services, Events and Organisations it's greyed out; send them one way instead.
Tip Afterwards you'll both find a task under My Tasks to visit each other's Digiprofile.
Tip The Handshake code only shows in the app. It's never on your wallet pass or in downloads, so nobody can reuse a photo of it.
Tip Under "Saved by" you can see who saved your Digiprofile.
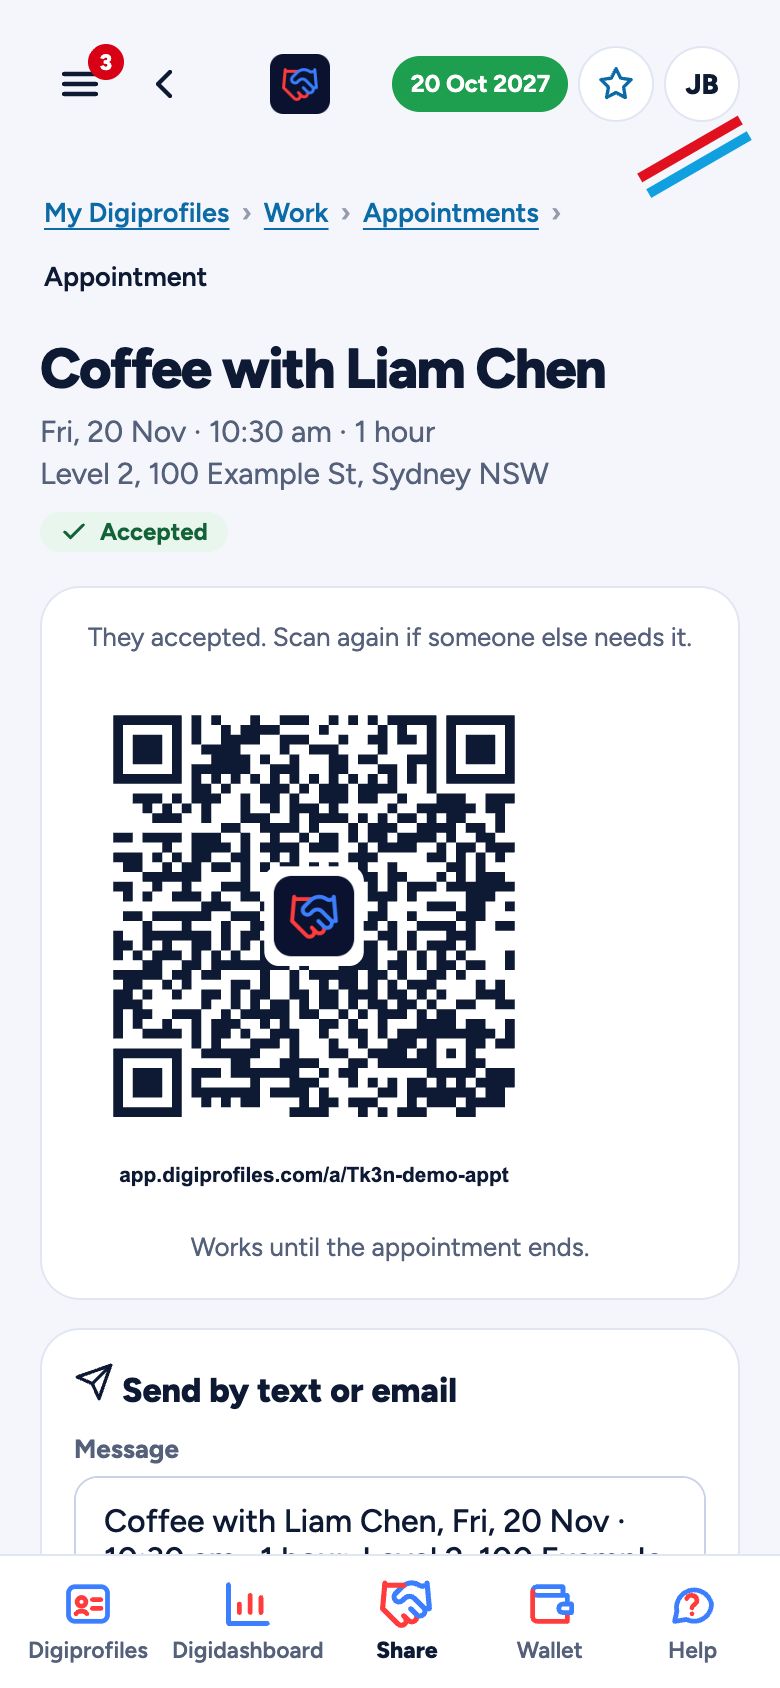
Make an appointment
Set a one-time meeting as you share any Digiprofile: a coffee, a product demo or a club visit. It goes into your calendar, and the other person accepts it to add it to theirs.
- Bring the Digiprofile to the front and tap Share in the bottom menu.
- Tap Add a one-time appointment (optional). Enter what it's about, the date, start time, how long (in minutes or hours), when to be reminded and the place. The place starts as the Digiprofile's address.
- Tap Create appointment. It now goes with whatever you share next: it's added to the message when you send your Digiprofile, and after a Handshake you can tap Show its code for them to scan.
- They see the details and tap Accept to add it to their calendar. Your appointment screen then shows Accepted.
Tip It's sent just once: after you send it, the Share screen is clear for next time.
Tip Changed your mind? Tap Don't include it before you send.
Tip The code and link stop working once the appointment ends. Adding it to your calendar again updates the same calendar entry.
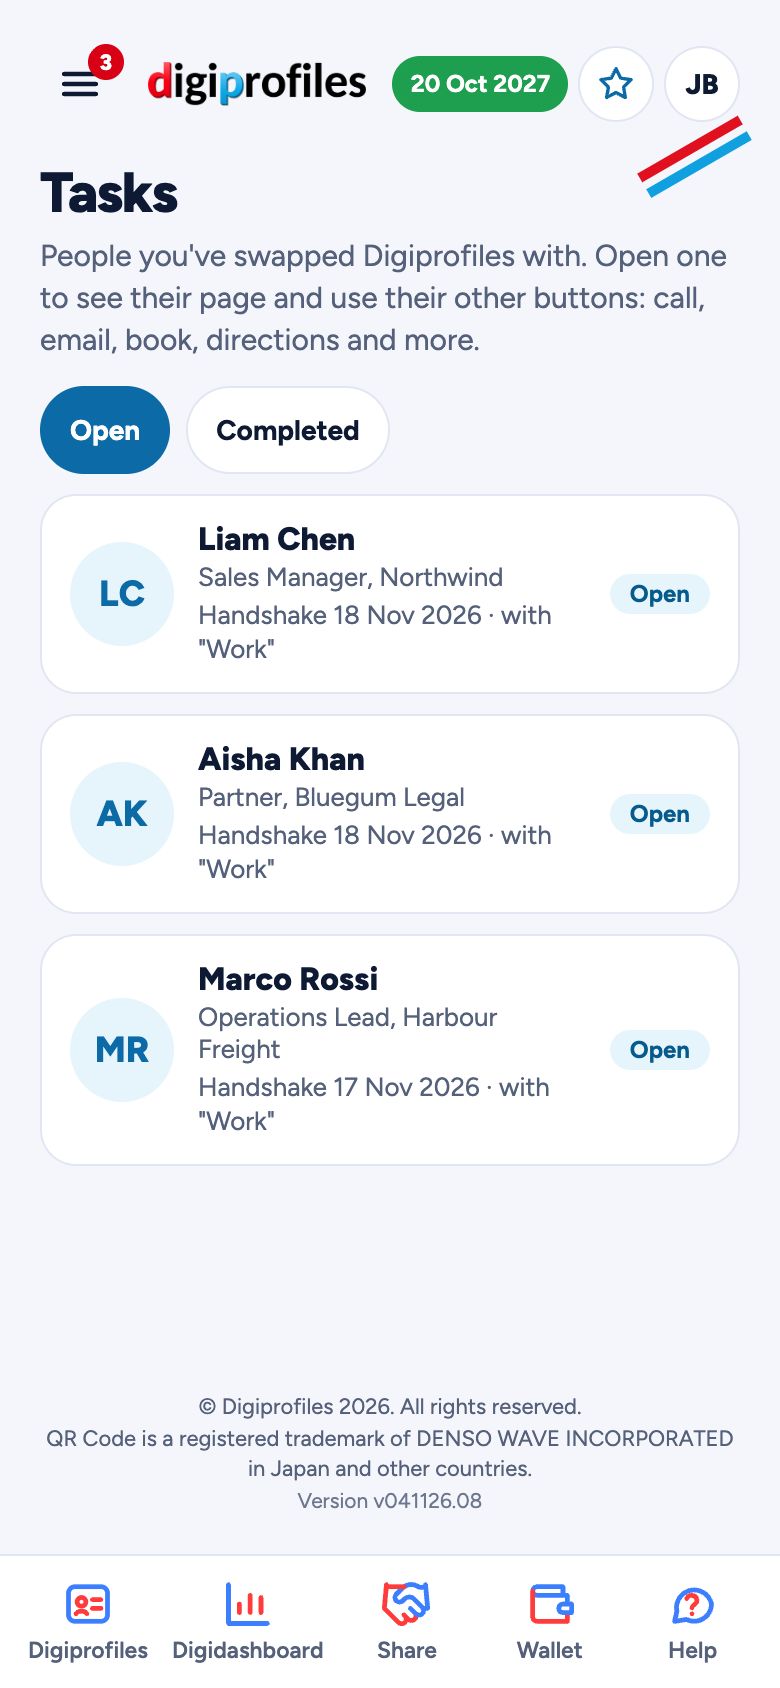
Follow up with Tasks
After a Handshake, the other person's Digiprofile is waiting for you under Tasks, so you can use their other buttons, like call, email, book a time or get directions.
- Open the menu (three lines, top left) and tap My Tasks. The red number shows how many are open.
- Tap a person to open their Digiprofile. Save contact is already green, because they're in your Contacts.
- Use any of their other buttons. The task is now marked Completed.
Tip Tap Completed at the top to see the ones you've done.
Share your Digiprofile
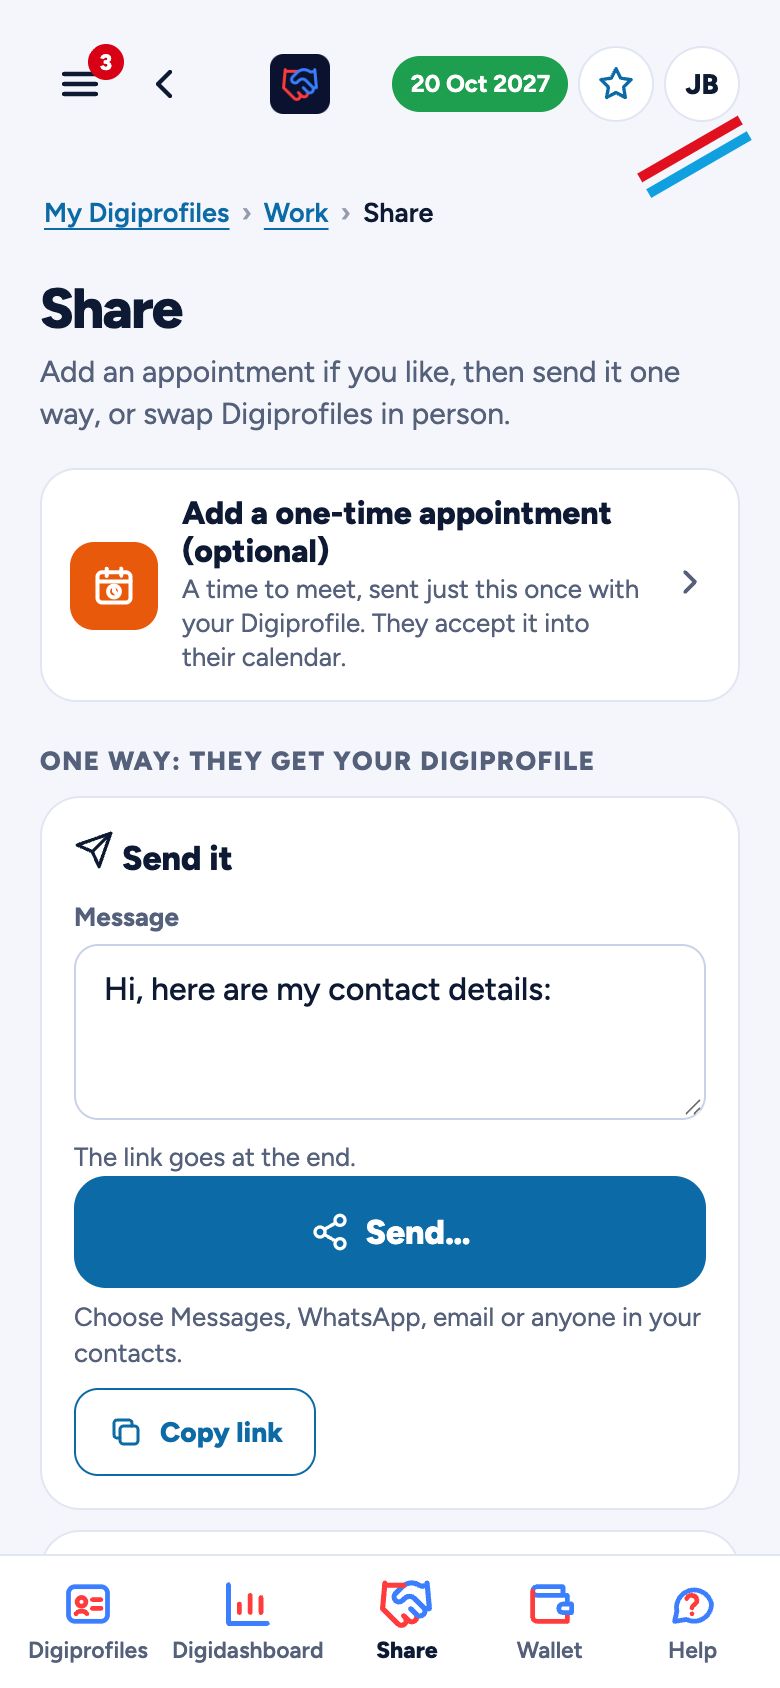
Tap Share in the bottom menu (the handshake icon). Everything is on one screen, for every kind of Digiprofile.
- Add a one-time appointment (optional): on any Digiprofile, set a time to meet first. It goes with the next thing you send, just this once (see the appointments guide).
- One way, Send it: change the message if you like, then tap Send…. Your phone's own share screen opens, with Messages, WhatsApp, email and your contacts. On a computer you get Email and Text message instead. Copy link copies the link to paste anywhere.
- Save or print the QR code: for signs, flyers and name tags.
- Email signature: tap Copy signature for your name and a small QR code, then paste it into your email signature: Gmail (Settings › See all settings › Signature), Outlook (Settings › Mail › Compose and reply) or iPhone Mail (Settings › Apps › Mail › Signature).
- Two way, Handshake: swap Digiprofiles in person with another member (Contact profiles and conferences).
- Invite someone: send a friend the link to make their own Digiprofile.
Tip To put it in your phone's wallet, tap Wallet in the bottom menu (see the wallet guide).
Tip QR codes and links always show your latest details, so printed codes never go out of date.
Tip Your Wallet pass shows your Digiprofile name (e.g. "Work") as its title, so you can tell your passes apart. Only you see it.
Save it to your phone's wallet
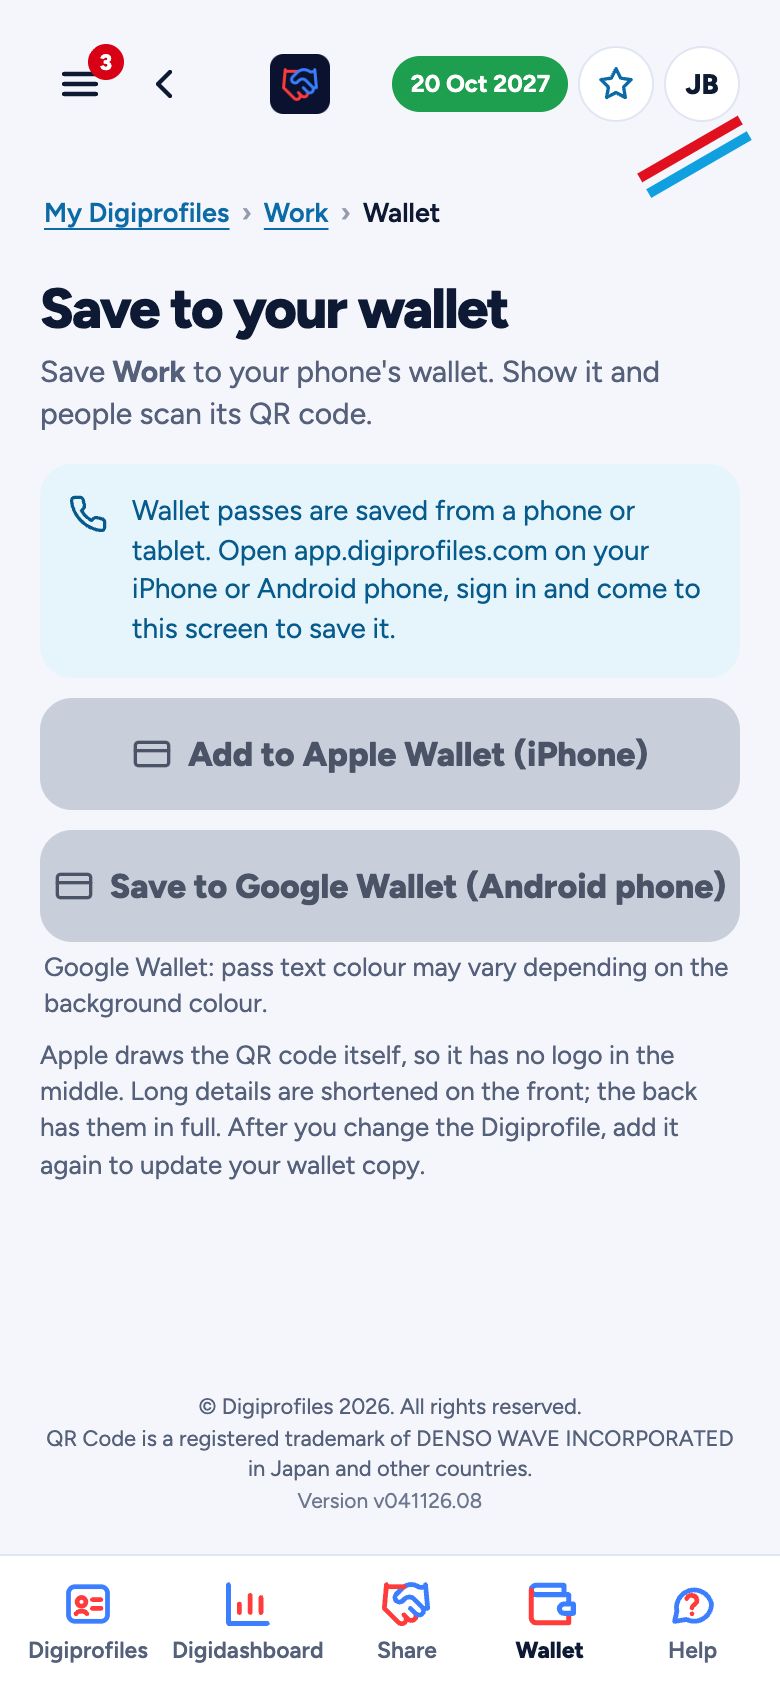
A Digiprofile in Apple Wallet or Google Wallet is the quickest way to share in person: open it and people scan the QR code, even without signal.
- Bring the Digiprofile to the front and tap Wallet in the bottom menu.
- On an iPhone it goes straight to Apple Wallet: tap Add. On an Android phone, it opens Google Wallet: tap Save.
- To show it, open your phone's wallet and pick it. Each pass has your Digiprofile name (e.g. "Work") at the top, so you can tell them apart.
Tip On a computer, the Wallet screen explains how: open app.digiprofiles.com on your phone, sign in and tap Wallet there.
Tip Wallet passes always use your Digiprofile's colour, not its theme or picture. After you change a Digiprofile, add it to your wallet again to update the copy there.
Invite a friend
Invite a friend by email: we send them links to our website and the app. When they become a paid subscriber, they count towards your referral reward.
- Tap Invite a friend in the menu (three lines, top left), on the Share screen (Invite by email), or on digiprofiles.com.
- Enter your friend's name and email, and their mobile if you like.
- Tap Send the invitation. To leave without sending, tap Cancel (or the back arrow at the top).
Tip Signed in, the invitation counts for your account. On the website without signing in, enter the email you sign in with.
Tip To see who joined through you, tap the Friends referred tile on your Digidashboard, or My referrals in the menu.
Tip Someone who was invited in the last 7 days isn't emailed again.
Gift a subscription
Give someone a Digiprofiles subscription. You don't need an account, but we check your mobile with a code.
Got a gift code? Create your account and enter it in Gift code on the free trial screen. It's checked straight away, and no payment is taken for the gifted time, which starts after your free trial. You still add a card for when it ends. Already have an account? Enter it under Gift code in Subscription details and tap Use it.
- Tap Gift a subscription in the menu.
- Enter your name and email. Enter your mobile, tap Send code, then enter the 6-digit code we text you. Signed in? Your account's mobile is already filled in and checked.
- Choose your country, and enter the name of the person it's for.
- Choose the size (×1 to ×4) and 1 or 3 years. The total shows in your currency.
- Tap Continue to payment and pay by card, Apple Pay or Google Pay.
- We email you a thank you, your invoice and a gift code with a link to pass on.
Tip Changed your mind? Tap Cancel (or the back arrow at the top) before paying, and nothing is charged. On the payment step, Back returns to your details.
Tip A gift code works once, within 12 months of when you bought it.
Your Managed Digiprofile
If your organisation uses Organisation Manager, it can give you a Managed Digiprofile: your work Digiprofile in its brand, with your name, job title and contact details. You also get 9 Digiprofiles of your own to use any way you like.
- Open the welcome email or text from your organisation and tap the link. It works for 7 days.
- New to Digiprofiles? Tap Text me a code, enter the code sent to your mobile, choose a password, and tick the two boxes. Add a personal email too, so you can still sign in if you leave.
- Already have an account? Sign in with your usual email and password and tick Add the Managed Digiprofile to my account.
- Your Managed Digiprofile is at the front of My Digiprofiles. Share it like any other.
Tip Your organisation looks after its details, which stay as they set them. You can always set its Actions (the buttons people can tap), Known as, your photo (if your organisation allows it) and its name (only you see it). Some organisations also let you change About or Qualifications. A note on the Digiprofile tells you what you can change.
Tip Your organisation only ever sees your Managed Digiprofile, never your own Digiprofiles or contacts. People who share their details with you through it are your contacts.
Tip If you leave, your organisation removes your Managed Digiprofile. Your account stays yours, with your own Digiprofiles and contacts, free for 14 days (plus any time you'd paid for before). Then choose a plan in Subscription details.
Organisation Manager: getting started
Organisation Manager gives your organisation's people Managed Digiprofiles in your brand. It's made for a computer: sign in at app.digiprofiles.com/org with your email, password and a 6-digit code texted to your mobile. New? Tap Start a free trial (14 days, up to 10 accounts).
- Templates: make your brand once: logo, background, organisation details and the buttons people start with.
- Groups: up to 10, such as Sales or Sydney office. Each group uses a template.
- Members: add people one at a time, or upload a spreadsheet. Each person gets their Managed Digiprofile straight away, and a welcome email or text.
- Leads, Billing and Settings do the rest. Each page has a Help link at the top for its guide, and the Need help? button at the bottom right answers questions.
Tip If your work email doesn't match your website, we check your organisation first, usually within a day. Confirm your email from the link we send you before adding people.
Tip If your organisation cancels, or a renewal isn't paid within 14 days, everyone's Managed Digiprofile is removed and their accounts become their own.
Make a template
A template is your brand on a Managed Digiprofile. Templates lists yours on the left; the one you choose opens on the right, looking just like a Digiprofile in the app.
- Tap + Add template, or choose a template in the list.
- Tap Details beside the Digiprofile to turn it over. Give the template a name (only your admins see it), then fill in your organisation's name, address, website, switchboard phone and About. Add your logo and choose a background: a colour, one of our themes, or your own picture.
- Words in [brackets], such as [First name] and [Job title], come from each member's details in your member list, so everyone's Digiprofile has their own.
- Tap Actions to choose the buttons a new Managed Digiprofile starts with, and what members may change: their photo, About or Qualifications.
- Tap Preview to see the page people get when they scan a member's QR code. Its buttons do nothing there.
- Tap Save. Saving a template updates every Managed Digiprofile that uses it straight away.
Tip Tap Profile to turn the Digiprofile back over and see the front, with its QR code.
Tip Each person can change their own buttons later; changing a template's starting buttons doesn't change theirs.
Tip To delete a template, first give its groups another one on the Groups page, then tap Delete template under it.
Set up groups
Groups sort your people, such as Sales, Field staff or Sydney office, and each group uses a template. You can have up to 10.
- Open Groups and add a group with a name that suits you.
- Choose its template. Everyone in the group gets that template's look and details.
- Change a group's template any time: everyone in it is updated at once.
Add and manage members
Members are the people who get a Managed Digiprofile.
- Open Members and tap + Add member. Enter their first and last name, work email (their login) and group. Mobile, job title, department, direct phone and employee ID are optional, but a mobile is needed for a welcome text.
- Save. They get their Managed Digiprofile at once, and a welcome email or text with a link to set their password. The link works for 7 days.
- Someone left? Open them under Members and tap Remove. Their Managed Digiprofile goes offline; their account stays theirs, with 14 days to choose a plan.
Tip Someone who already has a Digiprofiles account with that email is asked to accept the Managed Digiprofile instead. You only ever see their Managed Digiprofile.
Tip Welcome messages go by email, text or both, as set in Settings. Everyone without a mobile gets an email.
Upload a spreadsheet of members
Add or update lots of people at once from Excel or a CSV file.
- On Members, tap Upload a spreadsheet and download our template for the column headings.
- Fill in one row per person, then upload it. Nothing changes yet: you see who will be added, changed or is missing, and any rows to fix.
- Tick anyone missing from the list who should be removed. Nobody is removed unless you tick them.
- Tap to confirm. New people are added and get their welcome message; changes are made straight away.
Tip Upload the list again whenever it changes. A new group named in the list is made for you, using your first template.
See your leads
Leads shows the people who shared their details through your members' Managed Digiprofiles: their name, organisation, the date and which member they met. You see names only. The full details stay with the member, because they're that member's contacts.
Billing and plans
Only the owner sees Billing. Choose how many accounts to pay for, 1 year or 3 years (save 10%), your card and your invoices.
Tip Price per account per year, in your currency, graduated like tax brackets: 25 for the first 199, 22 for the next 300, 19 for the next 500, then 16. See digiprofiles.com/products.html.
Settings and admins
- Settings sets how welcome messages are sent (email, text or both) and adds a message of your own to them.
- The owner can add more admins there. Each admin signs in with their own email, password and texted code.
- Audit log shows every change made in Organisation Manager: who made it and when.
What people see when they scan
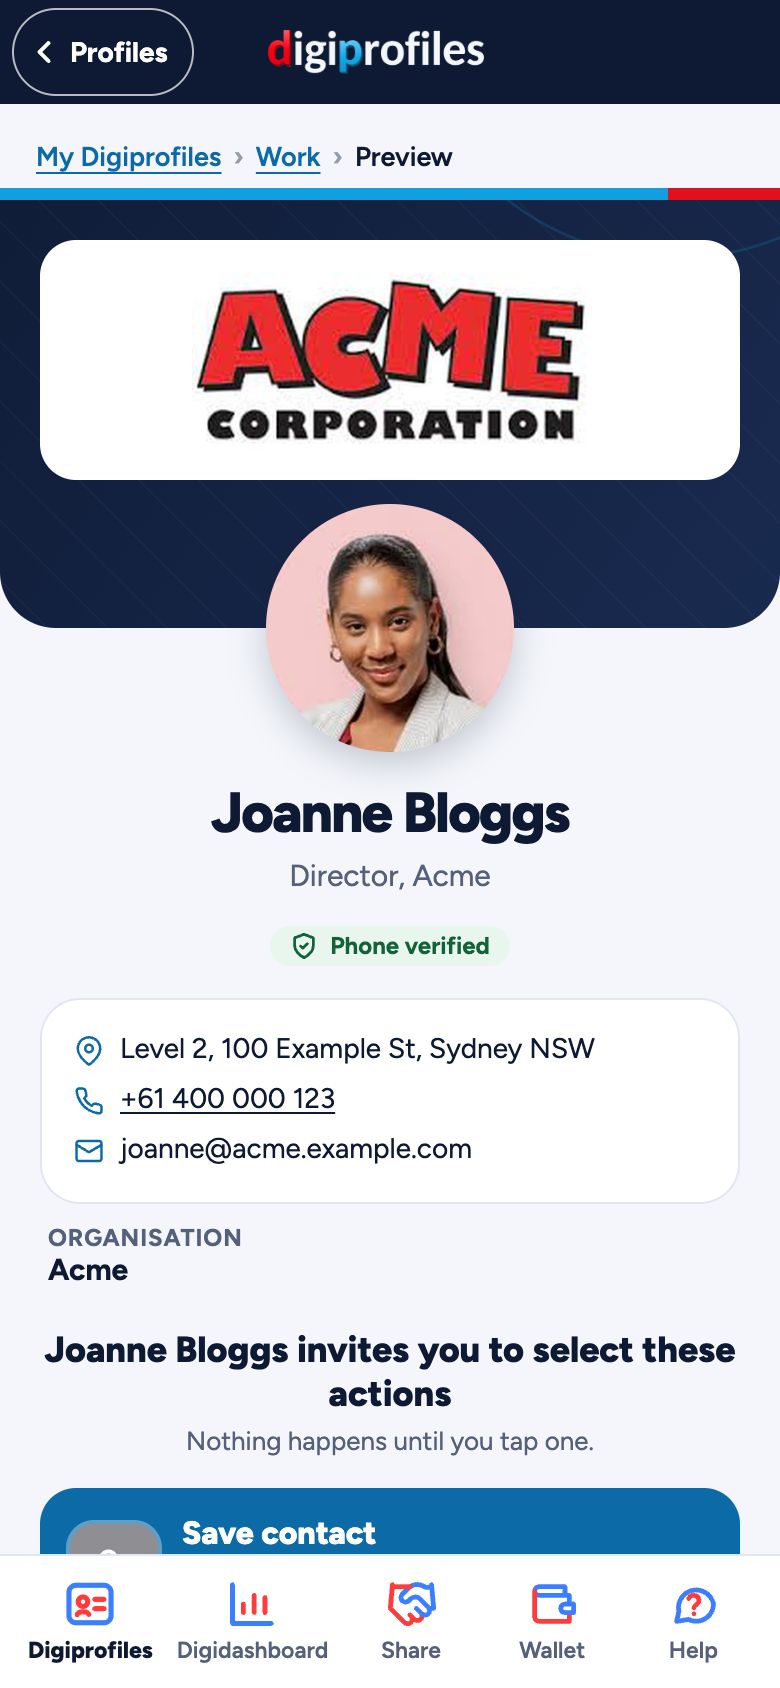
People don't need the app or an account. Scanning your QR code or opening your link shows a web page with your details and the buttons you chose.
- They tap a button: save your contact, call, email, open your website, get directions, add your event to their calendar or connect with you on social media.
- They can tap Share your details to send you their own details.
- They can tap I'll review this later, please remind me to get a reminder in their calendar an hour later. It turns green once done, like the other buttons.
Tip On an iPhone or iPad, Save contact opens the Contacts app: tap Create New Contact, then Done. Apple asks for this so no website can add contacts without the person agreeing.
Tip At the bottom, every page warns people to watch out for dodgy Digiprofiles, with a Report this Digiprofile link, and invites them to find out more at digiprofiles.com.
Tip To see your own page as others do, tap Preview on the right of the Digiprofile. Its buttons do nothing there, so you can't call yourself or send yourself your details by mistake. Tap Profile at the top right to turn it back over.
Collect contacts with Share your details
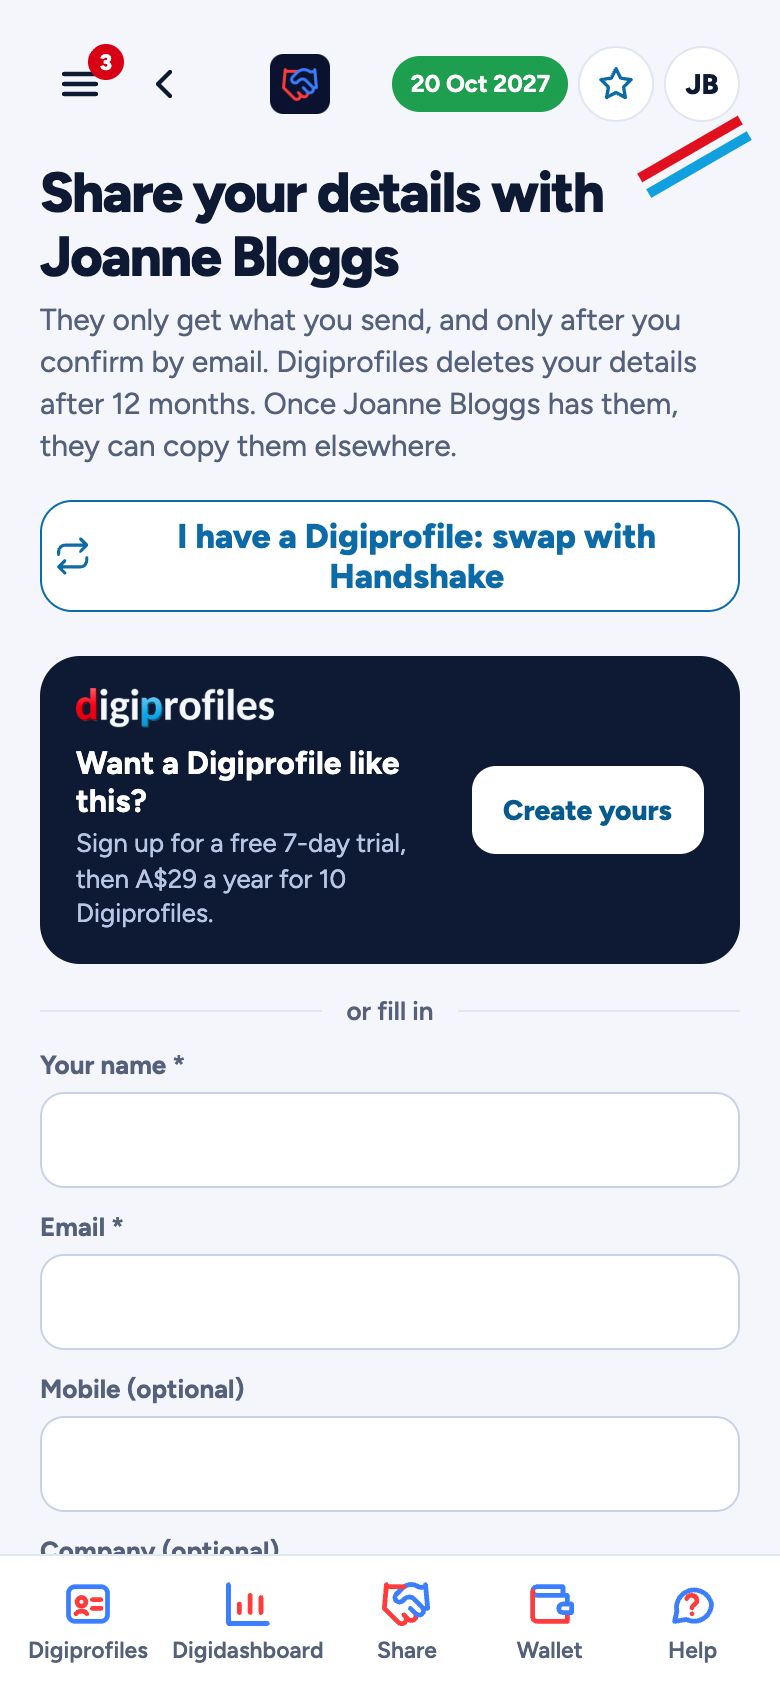
Share your details lets people who scan your Digiprofile send you their details, with their consent.
- Make sure Share your details is switched on in your Digiprofile's Actions.
- The other person fills in their name and email (and mobile, organisation or a note if they like), ticks the consent box and taps Send my details.
- They confirm by email. Until then you see "Awaiting confirmation".
- Once confirmed, they appear in My Contacts, showing which Digiprofile they came through.
Tip People who already have a Digiprofile can tap I have a Digiprofile: swap with Handshake to swap in person instead of typing.
Tip Digiprofiles deletes shared details after 12 months. Copies you've saved or exported are yours.
Find and export your contacts
My Contacts lists everyone who shared their details with you.
- Open the menu (three lines, top left) and tap My Contacts.
- Use Show to choose all contacts, one type of Digiprofile or a single Digiprofile.
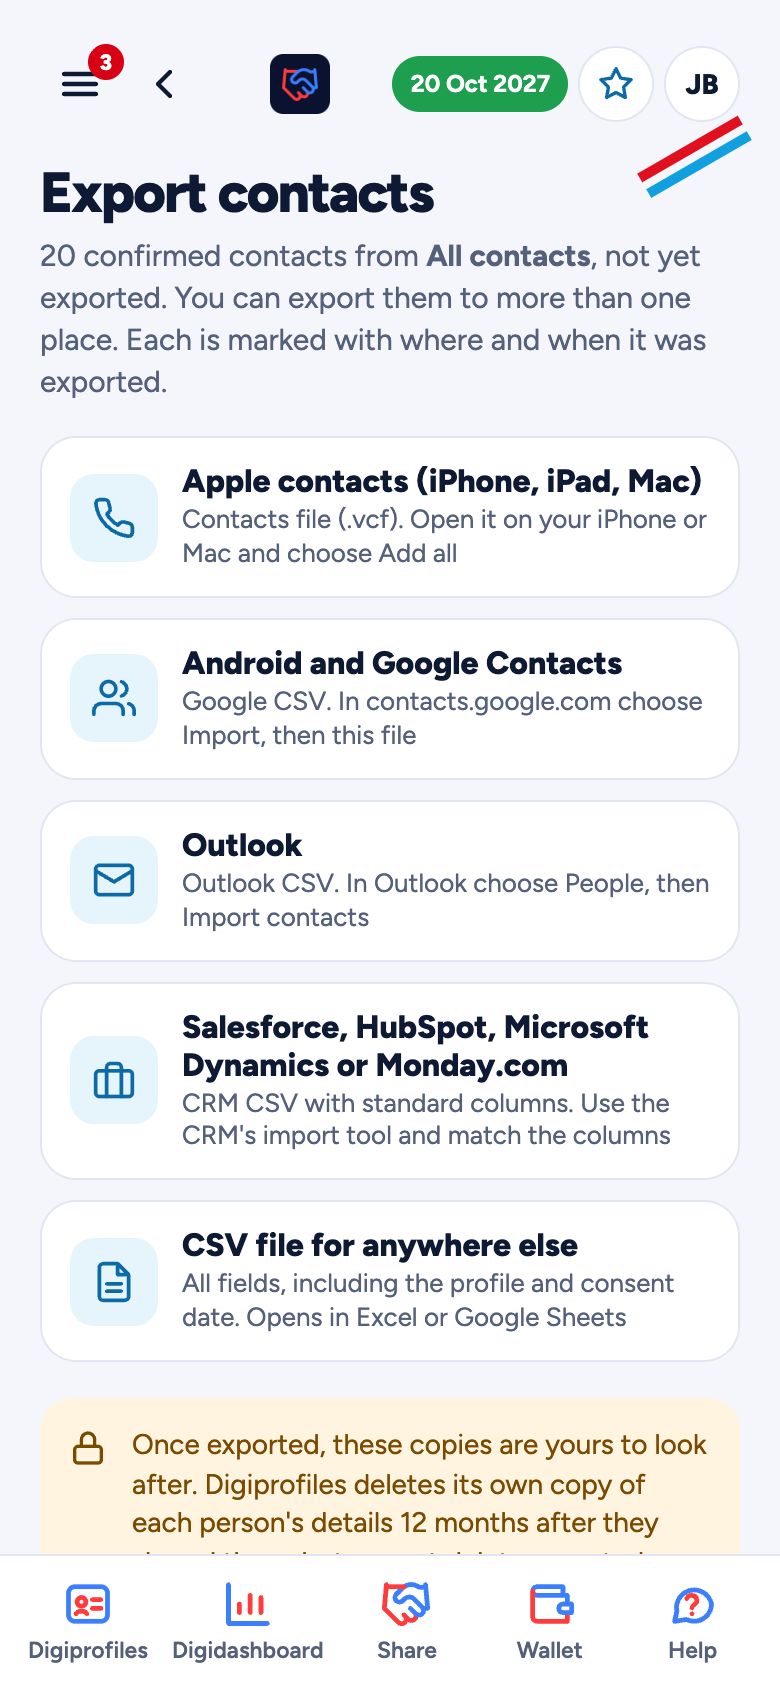
- Tap Export and choose where they're going: Apple contacts, Android and Google Contacts, Outlook, a CRM such as Salesforce or HubSpot, or a CSV file.
- Each exported contact is marked with where and when it went.
Tip "Only contacts not yet exported" is ticked to start with, so you only see new people. Untick it to see everyone.
Read your Digidashboard
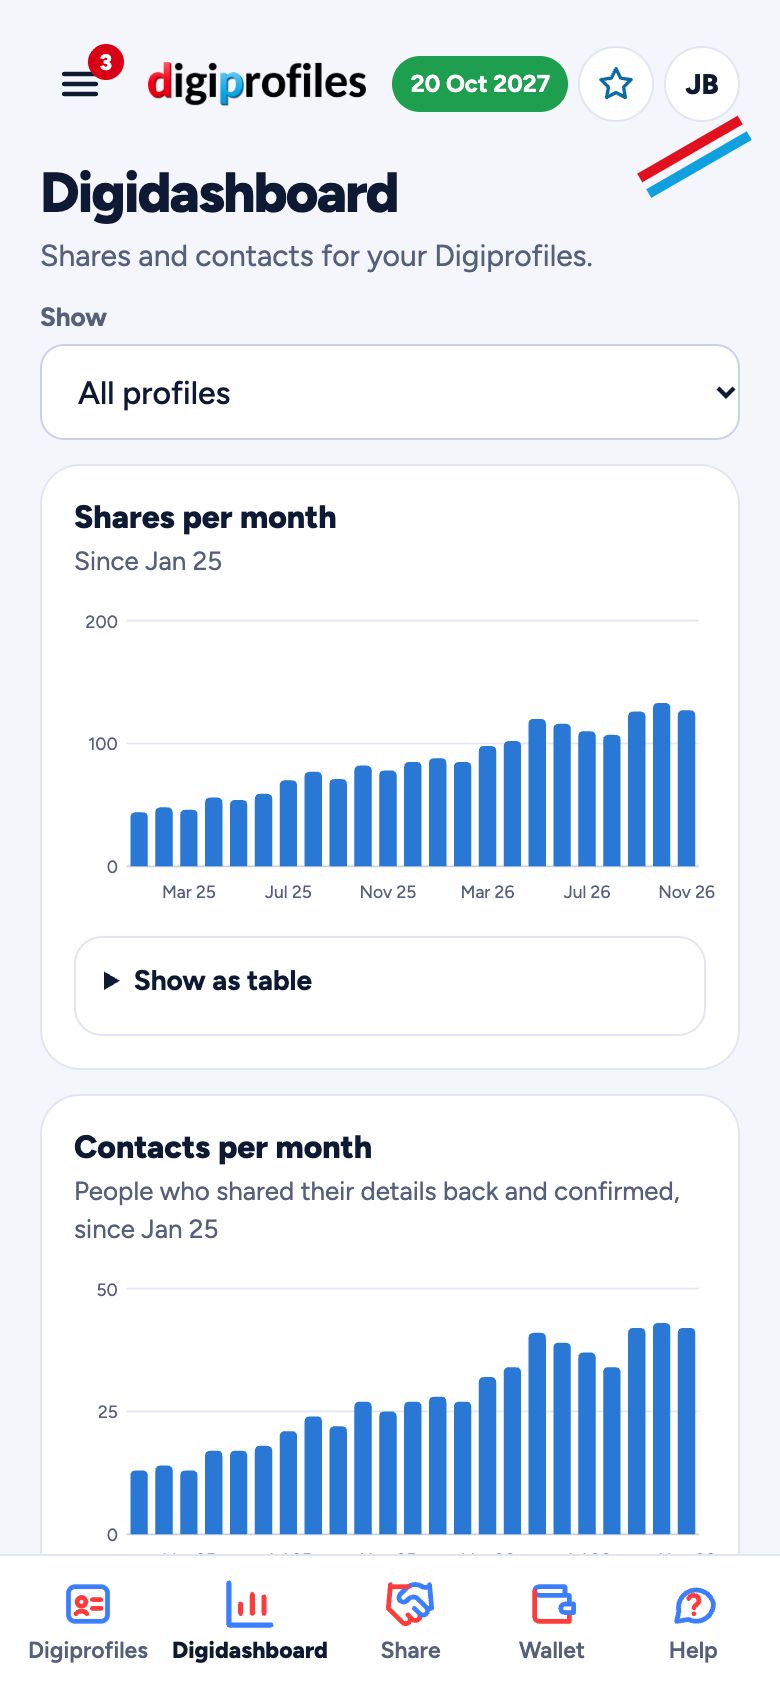
The Digidashboard shows how your Digiprofiles are doing.
- Tap Digidashboard in the bottom menu.
- Use Show to see all your Digiprofiles or just one.
- The tiles show shares and contacts since you joined, compared with this time last year.
- The charts show each month, year on year, and which Digiprofiles are shared most.
- If the referral offer is on, Friends referred and Free time earned show how many friends joined, how many became paid subscribers, and the free days you've earned (a month is 30 days). Tap Friends referred to see who joined and the invitations you've sent.
Tip Tap Show as table under a chart to see the exact numbers.
Plans, renewing and invoices
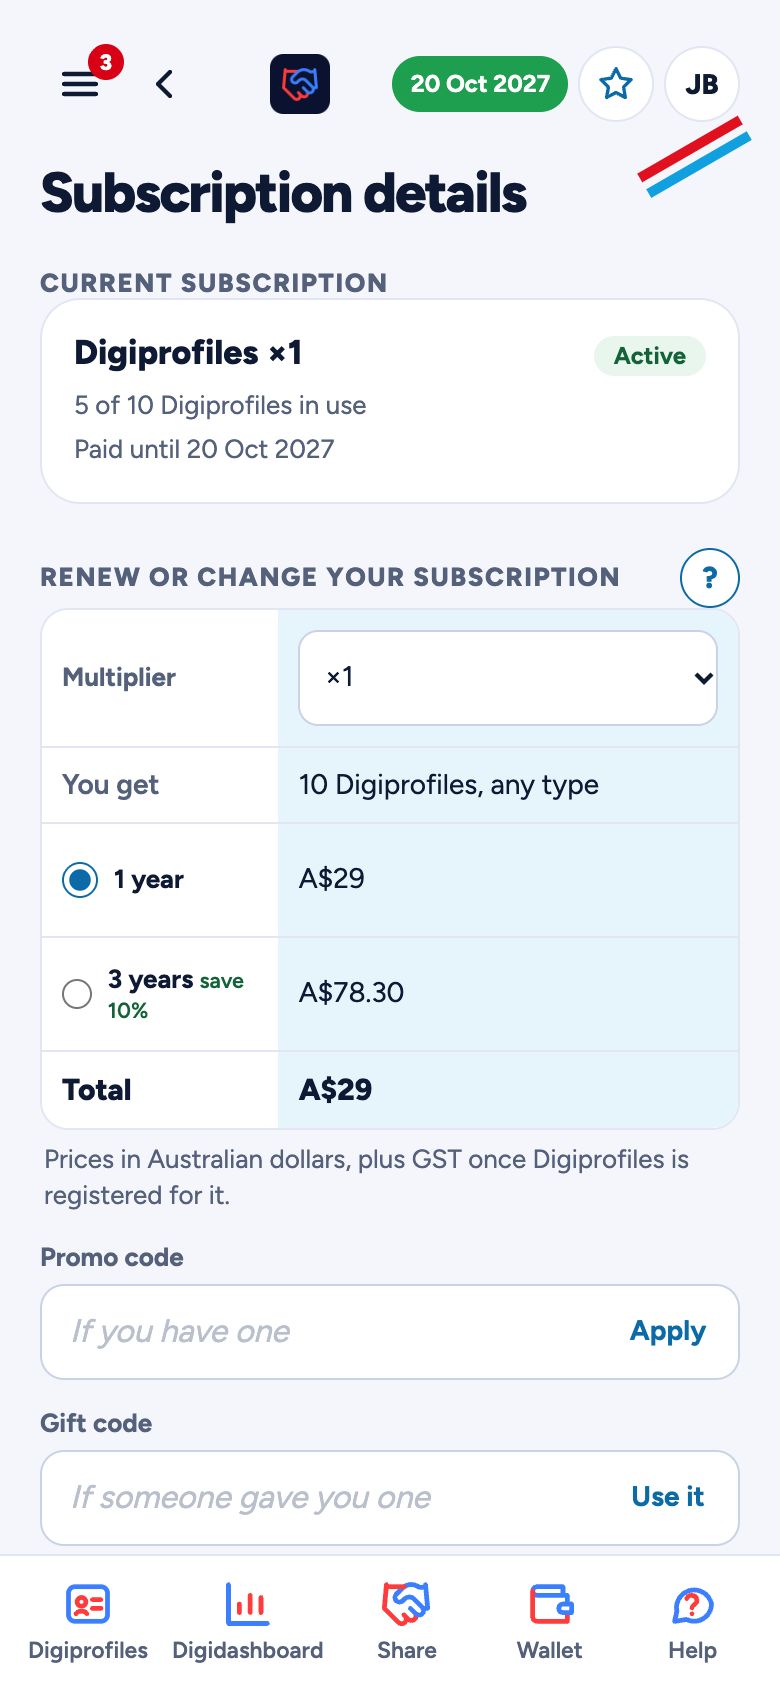
- Tap the coloured date at the top of the screen, or the circle with your initials (top right), then Subscription details.
- See your current plan and when it's paid until.
- During your free trial, choose your plan under Your plan after the free trial: the multiplier for more Digiprofiles, 1 year or 3 years (3 years has a discount), and a promo code if you have one. Tap Save my plan. Nothing is charged until the trial ends, and your trial end date doesn't change. After the trial, choose a plan and pay to renew or change.
- Payment shows the card on file. Tap Change card to use another one: the card details go straight to Stripe, our payment provider, and Digiprofiles never sees the card number.
- Your invoices are under Subscription History. Tap one to download it as a PDF.
- Buying for a business? Tap it above Payment and add the business name and its VAT or tax number. They're printed on your invoices. In the UK and the EU, a valid VAT number means no VAT is charged (reverse charge).
Tip Prices are in your own currency (A$, US$, €, £ or C$), set by your mobile number's country. Your card is charged in that same currency, so your statement matches your price. Outside Australia, your bank may add an overseas transaction fee.
Tip To cancel, tap Cancel subscription at the bottom of Subscription details. During the free trial you won't be charged at all. Cancelling only stops the renewal: nothing is refunded, your Digiprofiles keep working until the end date, and we email you to confirm. Changed your mind? Tap Resume subscription any time before the end date.
Tip If your subscription ends, you have 30 days to renew before your Digiprofiles stop showing.
Tip If your organisation gives you a Managed Digiprofile, it pays for your plan while you're with it, and Subscription details says so. Any time you'd already paid for is kept (up to 12 months) for when you leave.
Forgotten your password?
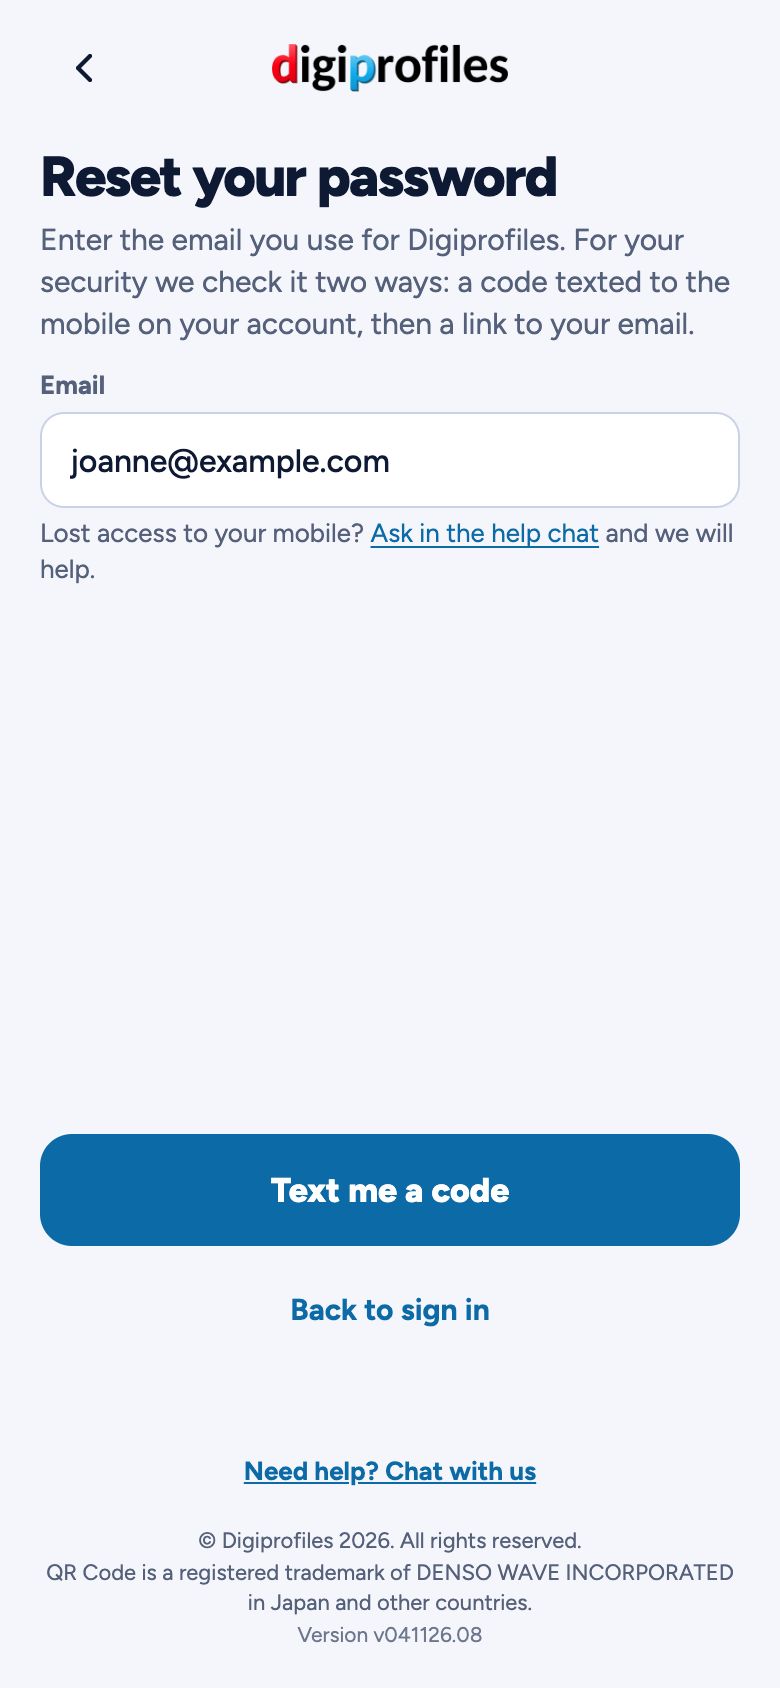
- On the sign-in screen, tap Forgot your password?
- Enter your email and tap Text me a code.
- Enter the 6-digit code we text to the mobile on your account.
- Open the link we email you and choose a new password.
- Sign in with your new password and a new code.
Tip Saving a new password signs your account out on every device, for your security.
Tip Lost your phone? Ask in the help chat and we'll help.
Your account: picture, language, reviews
Tap the circle with your picture or initials (top right) for your account options.
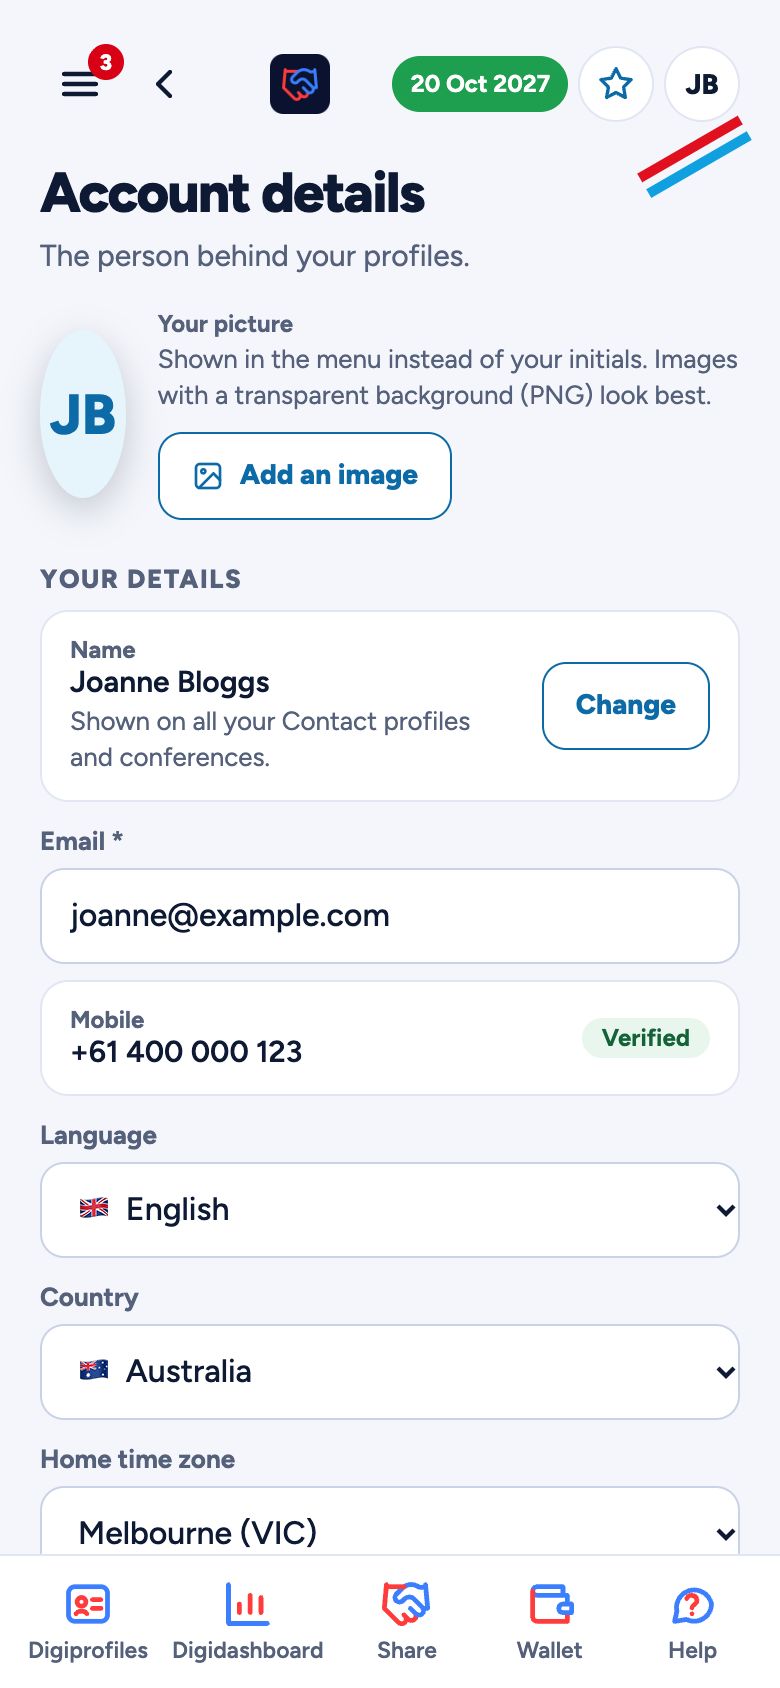
- Account details: your name, email, address, home time zone and picture. A new Contact profile starts with your picture.
- Your name is the name on all your Contact profiles and conferences, so it can't be changed on a Digiprofile. To change it, tap Change next to your name, enter the new name, then the 6-digit code we text to your mobile. It changes on all of them at once.
- Language: choose English, Mandarin, Hindi, Spanish, Arabic or French. English is ready now; the others switch on as their translations are finished.
- Give us a review: tap the star beside your picture to rate Digiprofiles from 1 to 5 stars and leave a comment. Reviews are anonymous, and you can leave another one after a while.
- Download my data: saves a PDF of everything Digiprofiles holds about you: your account details, every Digiprofile, the people who shared their details with you, Appointments and invoices.
Tip Digiprofiles is for people aged 16 and over. You tick "I am 16 or over" when you create your account.
Tip On your own phone or computer, tick Trust this device when you sign in to stay signed in until you log out. Otherwise Digiprofiles signs you out after 2 hours without activity, or when you close the browser.
Report a dodgy Digiprofile
Think a Digiprofile is fake, pretending to be someone else, or a scam? Tell us and our team will look into it.
- Tap Report this Digiprofile at the bottom of its page, or go to digiprofiles.com/report.html (it's also on the Safeguards page).
- The link to the Digiprofile is filled in for you, or paste it in. Only Digiprofiles links (app.digiprofiles.com/p/…) can be reported; for any other link, contact that website or the police.
- Say briefly why it looks suspicious, add your email and tap Send report.
- We email you a reference straight away, and again when we've finished.
Tip Watch out for a Digiprofile that uses someone else's name or business, asks you to pay, or asks for passwords or codes.
Tip If your own Digiprofile is reported, we'll email you. It keeps working while we look into it.
Still need help?
- Tap Help in the app's bottom menu, or Need help? on this website, to ask our help assistant.
- If it can't solve the problem, tap Email support and our team will take it from there.
Report a problem or make a suggestion
Something not working, or an idea to make Digiprofiles better? Tell us.
- Open the menu (three lines, top left) and tap Report a problem or make a suggestion, or go to digiprofiles.com/problem.html.
- Enter the email you sign in with, a short subject, and what happened (or your idea).
- Attach a screenshot if you can: a picture, PDF or text file up to 5 MB.
- Tap Send. You get a tracking number (such as P-1001) straight away, and by email.
Tip For a problem, say what you were doing, what you expected and what happened instead. The version number at the bottom of the screen helps us too.
Tip If the help chat can't solve something, it shows a Report a problem or make a suggestion button that opens this form already filled in with a subject and a summary of your chat (and your email, if you're signed in to the app). Check it and tap Send.
Tip Think a Digiprofile is fake or a scam? Use Report a dodgy Digiprofile instead.
Frequently asked questions
Quick answers to the questions we're asked most.
Does a Digiprofile replace a business card? Yes. It isn't a physical card, but it does everything a business card does: it gives people your contact details, and appointments too. And it does much more: people can save your details in a tap, set a reminder to follow up, add an event to their calendar, and plenty more.
Can I still have a physical card and get the power of a Digiprofile? Yes. Tap Share, then Save or print the QR code, and send the high-resolution file to your card printer. Put it wherever you like on the card, and you get the best of both worlds.
Does it do more than business cards? Yes. Digiprofiles is built for the many roles we each have in life: school groups, sporting clubs, college societies, work, personal and social contacts, religious groups, charities, and just about anything you do. You can also make Digiprofiles for events, products, services and organisations. The only limit is your imagination.
Is Digiprofiles a phone or tablet app? Yes and no. We chose not to make a separate app to download, because the web works on every phone, tablet and computer and is more flexible. Most browsers let you save Digiprofiles to your home screen, so it opens full screen from its own icon, just like an app. Open the menu (three lines, top left) and tap Add to home screen for the steps.
Can my organisation give its people Digiprofiles? Yes, with Organisation Manager: businesses, government, charities and clubs set up their brand once, upload a list of their people, and everyone gets a Managed Digiprofile. See Organisation Manager (for organisation admins) above, and the prices at digiprofiles.com/products.html.
Why does Digiprofiles use red and blue? We love a bit of colour on screen, and why not two favourite primary colours?
I added my product's website in Details, but the landing page doesn't show a link to it. Why? The websites in Details are part of your contact details: they go into the contact people save. To show a Website button on your landing page, tap Actions on the right of the Digiprofile and switch on Website. It uses your website unless you give it another address, such as your shop or booking page, and you can change the button's wording.